SABRE Maps/Adding a map
| SABRE Maps In-depth guide | ||
 | ||
| Pictures related to SABRE Maps View gallery (46) | ||
| Quick Links | ||
| Start Here Copyright • Stitching scans • Georeferencing maps in-depth • Creating map tiles | ||
| Related Terms | ||
| SABRE Maps SABRE Maps coverage • Map layer names • Co-ordinate Finder • Sheetfinder • Online Grid Calibrator | ||
The process of adding a map to SABRE Maps can seem quite complex, and offputting for people looking at how they can help; but actually the vast majority of steps are either quite simple in themselves, or have had tools written to make them simple to complete.
The process itself can be split into several tasks, of various levels of difficulty. This guide will look at a simple level at the various stages in the process, with links to more in-depth information about each stage. It should be noted that one person does not need to complete all parts of the process, but instead can simply help with the parts they are most comfortable with.
Finding appropriate mapping
The first stage in the process is to simply find an out-of-copyright map that both hasn't already been added to SABRE Maps, and that fits within the standard SABRE Maps preferred subject matter; although exceptions can be and are made for particularly interesting mapping outside the focus area.
SABRE Maps in-house mapping focuses on:
- Mapping of Great Britain, Ireland and the surrounding islands between the end of the First World War and the present day
- Topographical maps clearly showing the road network of the area of that map
- Maps at a scale where it is reasonably practical to cover more than just a local area
The various layer Coverage Project pages will help with exactly which maps are on SABRE Maps, should we have that information which isn't always readily available when we have been allowed to use maps from non-SABRE member sources.
Crown Copyright (for Ordnance Survey and Ordnance Survey of Northern Ireland maps) lasts for 50 complete years from the stated Crown Copyright date, so maps can be used on the 1st January after the 50 years are up. Government Copyright for Ordnance Survey Ireland mapping also lasts for 50 years. All other mapping has a copyright of 70 years, unless there is a named author or authors on the map, in which case copyright will last for the length of all authors' life plus 70 years. SABRE Maps cannot use in-copyright mapping without the agreement of the publishers.
Bear in mind that somewhat counter-intuitively, scans themselves have a copyright of their own, so if reusing from another source, we have to be aware of this and ensure that we have re-use permissions. In addition, modern reprints of old maps such as those produced by Alan Godfrey also have their own copyrights so cannot be used.
SABRE Maps can use modern mapping released as Ordnance Survey OpenData (and the OSNI and OSI equivalents), within the licensing terms stated for that mapping.
Scanning
Most scans of maps from individual collections has been scanned in section on A3 or A4 scanners, both business and domestic. A3 scanners give a better final scan, but A4 are fine - it simply involves more individual scans to be done.
The critical thing is that each section must overlap those to all sides by a reasonable amount, or the process to put them back together as a single sheet will fail. We also need the margin areas as well as the map itself, partly because we then have the revision code information that gives us exactly which map it is, but also because we need the grid reference or latitude/longitude information from the map.
Each individual scan needs to be in a JPG format, preferably at 300 - 400dpi. The scans need to be provided to a team member (often by the use of online storage such as Dropbox, Google Drive, or OneDrive), who can then pass them on to the next stage of the process.
It's easiest if the individual scans are labelled in a "row, column" or "battleships" format, so A1.JPG would be the top left-most scan, A2.JPG the one to the right of that, and B1.jpg the leftmost scan on the second row.
Stitching
Following the scanning process, we then need to put those scans back together into a coherent whole map, a process called stitching.
For this we use software called Hugin, which is designed as a stitcher for panoramic photos, but it works well for our purposes. A tutorial in how to stitch together flat scanned images can be found here, although this tutorial has somewhat been superceded by improvements in the software, and the majority of "control points" (points that appear on two images and so are used to match images together) can now be added by the click of a button.
For best results when adding control points, select a maximum of four connected images sections at a time, for example, A1, A2, B1 and B2 if the recommended "battleships" format for filenames above is followed. If more than four images are selected at any one time, then spurious control points can be added which will prevent the scans being stitched together correctly at the end.
Once the stitch is completed with a JPG image being set at the output, then this file should be passed onto the next stage.
Removing Dissections
Many older maps, especially OS Ministry of Transport Road Maps were published in a dissected format, so individual sections mounted on a cloth backing for ease of folding and to protect the map itself. Whilst this means that dissected maps tend to be in the best condition (outside those flat sheets stored in deposit libraries), and so are most valuable to SABRE Maps, we can't actually use the stitched map without a further process.
This process requires knowledge of graphics software such as Photoshop, GIMP or Paint.Net, where the dissections can be electronically removed and the individual sections carefully fitted back together so it appears that the original map was entire rather than dissected.
Once this has been done, then the map can be moved onto the next stage.
Calibration (Georeferencing)
Calibration, sometimes called georeferencing is a critical part of the process, but probably one of the simplest to complete.
It simply consists of clicking on specific points on a map image (usually gridline joins) in order, which then allows us to know exactly where in the real world each of these points refers.
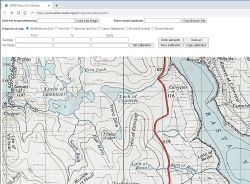
To help with this process, the Online Grid Calibrator is an easy-to-use entirely online tool to assist with the vast majority of maps that require georeferencing.
In addition to the Online Grid Calibrator, we have several tools to assist with more complex maps.
For these, the process is simply one of working out what kind of map you have - for example, an OS GB National Grid map, an Irish Grid or some other map type; and then following the correct set of instructions. As a guide, the more calibration points you create, the better the final map with "match" what's there in reality.
- The SABRE Maps Co-ordinate Finder is used for identifying the co-ordinates of a particular location, either in the modern OSGB National Grid, the Irish Grid, or a number of archaic formats historically used for mapping of these islands. It can also show the sheet boundaries of a number of OS, OSI and OSNI map series to assist with the process.
- The SABRE Maps Offline Grid Calibrator is used for the creation of the calibration files themselves from a map image, similar to the Online Calibrator but supporting more map types. It is primarily designed for OS, OSI and OSNI mapping.
- The SABRE Maps OSM Calibrator is used as a "catch-all" calibration tool for any map that the Grid Calibrator does not support.
After following the relevant instructions, the resultant text document containing the calibration information needs moved onto the next stage of the process where it needs to be kept together with the matching map scan.
Tiling
Tiling is probably the most complex part of the process, and requires several steps to be carefully followed.
There are three main stages in the process. First, using a piece of software called warp-sabre, the map scan and calibration file; a Google Earth compatible KML file is created. This file can then be used to check that the calibration of the map has been done properly by loading it into Google Earth and comparing roads, coastlines and other obvious features.
Once the KML is confirmed as being in the correct place, then unless it is the first map on a new layer, the cleartiles program is needed to "empty" the area of the new map ready to add the new map. If you miss this step, then the maps will not fit together nicely.
Finally, the gentiles program is required to actually generate the map tiles themselves. This will take some time, though fortunately it doesn't try to regenerate map tiles that already exist.
Uploading
Finally, you need FTP access to the SABRE server itself, which can be granted by the server manager, and uploading the tiles to the relevant part of the server with the agreement of the SABRE Maps Co-ordinator so there is no danger of two people doing similar things at once.
This should only be done by someone with reasonable technical skills and familiarity with FTP software, as it runs the risk of breaking things if you get it wrong! Fortunately, we do keep backups, so we can get things back.
Adding new layers and layer groups
As it stands, this requires a developer, or someone with relevant skills, and cannot be done without.
Again, this needs to be done with the agreement of the SABRE Maps Co-ordinator to prevent multiple people trying to do things at once.
Once completed, the relevant developer needs to add the layer name to SABRE Maps/Layer names to ensure that Wiki editors can use that layer within articles.
Annotation files
In addition to the maps themselves, annotation files are simple text documents that are used to show exactly which map is in the middle of the SABRE Maps window at any time. It doesn't require any technical knowledge to complete, but can be done by looking at the maps themselves and getting the revision and printing information off them.
Each file contains map information with each map separated by the plus (”+”) symbol. Each map information contains fields separated by the comma (”,”) symbol. The format of each field in the entry is:
- Filename (not displayed)
- Top left corner lat/lon - a pair of values split by a colon (”:”)
- Bottom right corner lat/lon - a pair of values split by a colon (”:”)
- Sheet number
- Description
- Revision information, including revision code and publishing date. For maps published after 1967, the copyright date also needs to be included.
Note: Latitude and Longitude given must be compatible with the WGS84 system; which is different to that printed on maps prior to 1984, and may be different after this date. For maps that do not use WGS84, then the relevant conversion can be completed via either the SABRE Maps Co-ordinate Finder or the Fielden Maps Co-ordinate Converter.
Example:
09.kml,55.289752:-2.946241,53.931716:-0.021131,9,North East England, Revision B (February 1964)+


