Category:Images by Glen pictures
Jump to navigation
Jump to search
Media in category 'Images by Glen pictures'
The following 200 files are in this category, out of 1,413 total.
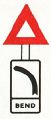
(previous page) (next page) 1954 Highway Code - Bend.jpg 254 × 571; 18 KB
 1954 Highway Code - Bends for 1 3-4 miles.jpg 200 × 300; 11 KB
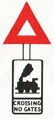
 1954 Highway Code - Crossing no gates.jpg 176 × 293; 10 KB
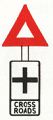
 1954 Highway Code - Crossroads.jpg 250 × 583; 20 KB
 1954 Highway Code - Hill 1 in 12.jpg 183 × 300; 9 KB
 1954 Highway Code - Hump bridge.jpg 175 × 292; 9 KB
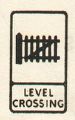 1954 Highway Code - Level crossing.jpg 193 × 309; 11 KB
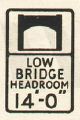 1954 Highway Code - Low bridge headroom 14'-0.jpg 204 × 307; 12 KB
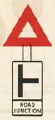 1954 Highway Code - Road junction.jpg 263 × 576; 18 KB
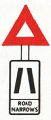
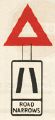 1954 Highway Code - Road narrows.jpg 263 × 576; 19 KB
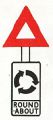
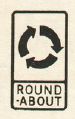 1954 Highway Code - Roundabout.jpg 198 × 315; 11 KB
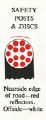
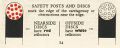 1954 Highway Code - Safety posts and discs.jpg 1,059 × 421; 65 KB
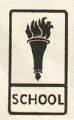 1954 Highway Code - School.jpg 187 × 302; 10 KB
 1959 Highway Code - Bend.jpg 210 × 490; 12 KB
 1959 Highway Code - Crossing no gates.jpg 217 × 480; 14 KB
 1959 Highway Code - Crossroads.jpg 214 × 483; 13 KB
 1959 Highway Code - Half-barrier level crossing.jpg 1,327 × 665; 125 KB
 1959 Highway Code - Road narrows.jpg 208 × 491; 13 KB
 1959 Highway Code - Roundabout.jpg 217 × 491; 14 KB
 1959 Highway Code - Safety posts and discs.jpg 257 × 671; 26 KB
 1959 Highway Code - School.jpg 223 × 502; 15 KB
 2010 Wolverhampton AGM 1.jpg 1,920 × 1,072; 337 KB
 2010 Wolverhampton AGM 2.jpg 1,920 × 1,440; 393 KB
 2010 Wolverhampton roadtrip 1.jpg 1,920 × 1,440; 498 KB
 3T - Only one vehicle - Coppermine - 7243.jpg 1,600 × 1,200; 345 KB
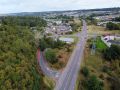
 A737 Dalry Bypass - Blairland aerial looking north.jpg 2,000 × 1,333; 984 KB
 A737 Dalry Bypass - C57 Blair Road overbridge.jpg 2,000 × 1,500; 934 KB
 A737 Dalry Bypass - Highfield Roundabout aerial looking north.jpg 2,000 × 1,334; 921 KB
 A737 Dalry Bypass - Hillend aerial looking north.jpg 2,000 × 1,333; 964 KB
 A737 Dalry Bypass - Hillend project sign.jpg 2,000 × 1,500; 967 KB
 A737 Dalry Bypass - Hillend Roundabout A737 south ADS.jpg 2,000 × 1,500; 944 KB
 A737 Dalry Bypass - Hillend Roundabout aerial looking north east.jpg 2,000 × 1,333; 934 KB
 A737 Dalry Bypass - Hillend Roundabout B714 ADS.jpg 2,000 × 1,500; 957 KB
 A737 Dalry Bypass - River Garnock Viaduct aerial looking east.jpg 2,000 × 1,333; 985 KB
 A737 Dalry Bypass - River Garnock Viaduct road deck.jpg 2,000 × 1,500; 914 KB
 A76 Mennock WS2+1 merge sign.jpg 1,280 × 960; 857 KB
 A76 Mennock WS2+1 merge.jpg 1,280 × 960; 860 KB
 A76 Mennock WS2+1.jpg 1,280 × 960; 915 KB
 A77 Maybole Bypass - Broomknowes Roundabout aerial from south east.jpg 2,000 × 1,334; 917 KB
 A77 Maybole Bypass - Maybole B77 roundabout exit sign.jpg 2,000 × 1,500; 984 KB
 A8 Bargeddie Junction - aerial from south.jpg 2,000 × 1,333; 968 KB
 A8(M) Baillieston aerial.jpg 1,920 × 1,280; 1,005 KB
 A8082 - C1044 Culduthel Avenue junction aerial.jpg 2,000 × 1,499; 995 KB
 A8082 - C1044 Culduthel Avenue junction.jpg 2,000 × 1,506; 998 KB
 A8082 Dellfield Roundabout - aerial looking north.jpg 2,000 × 1,500; 994 KB
 A8082 West Link - Holm aerial from south.jpg 2,000 × 1,501; 959 KB
 A816 Kintraw Landslip - aerial from west - March 2024.jpg 2,000 × 1,334; 979 KB
 A816 Kintraw Landslip - high aerial from SW - March 2024.jpg 2,000 × 1,333; 998 KB
 A816 Kintraw Landslip - wide aerial from NW- March 2024.jpg 2,000 × 1,334; 970 KB
 A82 Ballachuilsh Bridge - high aerial from west.jpg 1,920 × 1,280; 891 KB
 A82 Brachla emergency phone.jpg 1,280 × 960; 949 KB
 A82 Brachla phone.jpg 960 × 1,280; 732 KB
 A82 Dochgarroch - Drive on the left.jpg 2,000 × 1,506; 984 KB
 A82 Dochgarroch - Otters for ¾ mile.jpg 2,000 × 1,506; 988 KB
 A82 Drumnadrochit - fire station.jpg 768 × 1,024; 608 KB
 A82 Drumnadrochit - pedestrians crossing 200 yds.jpg 768 × 1,024; 602 KB
 A82 Drumnadrochit - road liable to icing.jpg 768 × 1,024; 565 KB
 A82 Drumnadrochit - Zebra crossing 100 yds.jpg 1,280 × 960; 246 KB
 A82 Inverlochy VMS - Stay at home.jpg 2,000 × 1,282; 394 KB
 A82 Lewiston - chevron and barrier.jpg 1,280 × 960; 159 KB
 A82 Lochybridge Roundabout - aerial from SE.jpg 2,000 × 1,500; 976 KB
 A82 Lochybridge Roundabout - aerial from south.jpg 2,000 × 1,500; 942 KB
 A82 Lochybridge Roundabout - NB ADS.jpg 2,000 × 1,506; 995 KB
 A82 Smelter Roundabout - aerial from south.jpg 2,000 × 1,500; 968 KB
 A82 Smelter Roundabout - NB ADS.jpg 2,000 × 1,506; 987 KB
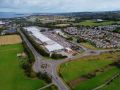
 A82 Smelter Roundabout - retail park aerial from west.jpg 2,000 × 1,500; 991 KB
 A82 Urquhart Castle - direction and drive on left signs.jpg 1,280 × 887; 955 KB
 A82 Urquhart Castle - junction on bend - max speed 30.jpg 1,280 × 960; 995 KB
 A82 Urquhart Castle - series of bends for700yds.jpg 1,280 × 960; 887 KB
 A822 Dunkeld railway bridge.jpg 1,600 × 1,200; 238 KB
 A822 layby.jpg 1,280 × 797; 614 KB
 A823 Rounabout - Coppermine - 8822.jpg 1,280 × 960; 161 KB
 A823(M) - Coppermine - 8823.jpg 1,280 × 960; 154 KB
 A823(M) - Coppermine - 8824.jpg 1,280 × 960; 207 KB
 A823(M) - Coppermine - 8825.jpg 1,280 × 960; 140 KB
 A823(M) - Coppermine - 8826.jpg 1,280 × 960; 151 KB
 A823(M) - Coppermine - 8827.jpg 1,280 × 960; 125 KB
 A823(M) - Coppermine - 8828.jpg 1,280 × 960; 124 KB
 A823(M) - Coppermine - 8829.jpg 1,280 × 960; 153 KB
 A823(M) - Coppermine - 8830.jpg 1,280 × 960; 115 KB
 A823(M) - Coppermine - 8831.jpg 1,280 × 960; 196 KB
 A823(M) - Coppermine - 8832.jpg 1,280 × 960; 338 KB
 A823(M) - Coppermine - 8833.jpg 1,280 × 960; 246 KB
 A823(M) - Coppermine - 8834.jpg 1,280 × 960; 237 KB
 A823(M) - Coppermine - 8835.jpg 1,280 × 960; 225 KB
 A83 - falling rocks - when lights flash.jpg 2,448 × 3,264; 3.18 MB
 A830 Banavie bridges & Neptune's Staircase.jpg 2,000 × 1,500; 964 KB
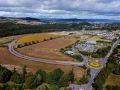
 A830 Blar Mhor Roundabout - aerial from SE.jpg 2,000 × 1,500; 993 KB
 A830 Blar Mhor Roundabout - aerial from west.jpg 2,000 × 1,500; 954 KB
 A830 Blar Mhor Roundabout - WB ADS.jpg 2,000 × 1,506; 927 KB
 A830 Lochybridge - aerial of bridge from SW.jpg 2,000 × 1,500; 964 KB
 A830 Morar - Junction marker post.jpg 720 × 960; 110 KB
 A831 Cannich Bridge.jpg 1,280 × 960; 1.05 MB
 A831 Comar Bridge.jpg 1,600 × 1,200; 232 KB
 A832 Braemore - Blind summit.jpg 1,280 × 960; 174 KB
 A832 Braemore Junction - ADS.jpg 2,000 × 1,500; 919 KB
 A832 Braemore Junction - NC500 ADS.jpg 2,000 × 1,500; 997 KB
 A832 Bridge of Grudie.jpg 1,280 × 960; 953 KB
 A832 Corrieshalloch - Drive on left sign.jpg 1,920 × 1,440; 992 KB
 A832 Ice warning.jpg 768 × 1,024; 595 KB
 A832 Kinlochewe - bridge from south.jpg 2,000 × 1,500; 942 KB
 A832 Kinlochewe - junction looking east.jpg 2,000 × 1,500; 925 KB
 A832 Kinlochewe - viewpoint project sign.jpg 2,000 × 1,500; 975 KB
 A832 Kinlochewe - WRCT NB ADS.jpg 2,000 × 1,500; 918 KB
 A832 Little Gruinard.jpg 1,280 × 960; 185 KB
 A832 Lubmore - ERDF sign.jpg 2,000 × 1,500; 941 KB
 A832 Red squirrel crossing.jpg 1,278 × 803; 867 KB
 A835 Braemore - Ice warning signs.jpg 2,000 × 1,125; 937 KB
 A835 Braemore Junction - Flag signs looking east.jpg 2,000 × 1,500; 969 KB
 A835 Braemore Junction - Flag signs.jpg 2,000 × 1,500; 973 KB
 A835 Braes Bridge - Red squirrels.jpg 2,000 × 1,399; 972 KB
 A835 Conon Bridge.jpg 1,280 × 960; 795 KB
 A835 Corrieshalloch layby - drive on left sign.jpg 1,920 × 1,440; 970 KB
 A835 Leanaig - accident recovery - road closed.jpg 2,000 × 1,500; 986 KB
 A835 River Conon & Black Isle aerial.jpg 1,400 × 933; 865 KB
 A835 River Conon - aerial from South.jpg 1,400 × 933; 666 KB
 A835 River Conon.jpg 1,280 × 960; 721 KB
 A835 Ullapool - Otters crossing.jpg 1,920 × 1,440; 977 KB
 A835 Ullapool - SB ADS.jpg 2,000 × 1,500; 991 KB
 A835 Ullapool - WB ADS.jpg 2,000 × 1,500; 973 KB
 A836 Dounreay - Police firing range warning.jpg 1,920 × 1,440; 1.85 MB
 A836 Naver Bridge - aerial from SE - May 2023.jpg 2,000 × 1,333; 937 KB
 A836 Naver Bridge - aerial from south - May 2023.jpg 2,000 × 1,334; 982 KB
 A836 Naver Bridge - bridge from SE - May 2023.jpg 2,000 × 1,506; 971 KB
 A836 Naver Bridge - bridge from SW - May 2023.jpg 2,000 × 1,506; 948 KB
 A836 Naver Bridge - looking east along bridge deck - May 2023.jpg 2,000 × 1,506; 990 KB
 A836 Naver Bridge - top down aerial - May 2023.jpg 2,000 × 1,333; 946 KB
 A836 Naver Bridge - west approach - no footway warning.jpg 2,000 × 1,506; 997 KB
 A836 Naver Bridge - wide aerial from south - May 2023.jpg 2,000 × 1,333; 938 KB
 A836 Passing place sign.jpg 801 × 1,280; 141 KB
 A836 single track road.jpg 1,280 × 960; 143 KB
 A837 Invershin - Give way 100 yds.jpg 720 × 960; 118 KB
 A837 Lochinver - drive on the left.jpg 1,920 × 1,440; 967 KB
 A838 Laxford Bridge - aerial from SE.jpg 2,000 × 1,333; 969 KB
 A838 Laxford Bridge - arch from SE.jpg 2,000 × 1,500; 973 KB
 A838 Laxford Bridge - drive on left.jpg 2,000 × 1,500; 975 KB
 A838 Laxford Bridge - ERDF sign.jpg 2,000 × 1,500; 973 KB
 A838 Laxford Bridge - junction aerial from SW.jpg 2,000 × 1,333; 969 KB
 A838 Laxford Bridge - junction flag signs.jpg 2,000 × 1,500; 979 KB
 A838 Laxford Bridge - low aerial from east.jpg 2,000 × 1,334; 972 KB
 A838 Laxford Bridge - NWHTR JoG RCS.jpg 2,000 × 1,500; 951 KB
 A838 Laxford Bridge - Police notice allow overtaking.jpg 2,000 × 1,500; 974 KB
 A838 Laxford Bridge - Police notice use passing places.jpg 2,000 × 1,500; 998 KB
 A838 Laxford Bridge - road looking north.jpg 2,000 × 1,500; 981 KB
 A838 Laxford Bridge - SB ADS.jpg 2,000 × 1,500; 998 KB
 A838 Laxford Bridge - WB ADS.jpg 2,000 × 1,500; 974 KB
 A838 Laxford Bridge North Approach - EU sign.jpg 2,000 × 1,352; 978 KB
 A838 Laxford Bridge sign.jpg 1,920 × 1,130; 1.67 MB
 A838 Loch na Thull - aerial from south east.jpg 1,920 × 1,280; 964 KB
 A838 Loch na Thull - March 2023 snow looking south.jpg 2,000 × 1,506; 954 KB
 A839 Wild goats for 1 miles.jpg 1,600 × 1,200; 1.29 MB
 A850 Skeabost - side road.jpg 1,280 × 960; 259 KB
 A851 Cattle grid.jpg 1,280 × 960; 927 KB
 A851 Chevrons.jpg 1,280 × 953; 906 KB
 A855 Duntulm aerial looking north.jpg 1,920 × 1,280; 988 KB
 A862 Conon Bridge - aerial.jpg 1,400 × 933; 920 KB
 A862 Conon Bridge - three bridges aerial from East.jpg 1,400 × 933; 711 KB
 A862 Conon Bridge - three bridges aerial from West.jpg 1,400 × 933; 947 KB
 A862 Muir of Ord railway bridge traffic signals.jpg 1,280 × 960; 149 KB
 A862 Telford Street Roundabout sign.jpg 1,024 × 768; 102 KB
 A862, Muirtown Swing Bridge - Coppermine - 6205.jpg 1,392 × 618; 98 KB
 A87 - A890 Closed.jpg 1,280 × 960; 893 KB
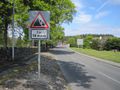 A87 Broadford - falling rocks 16 miles.jpg 1,280 × 960; 992 KB
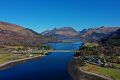
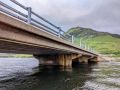
 A87 Clachan Duich Bridge - aerial view from east.jpg 1,920 × 1,280; 908 KB
 A87 Clachan Duich Bridge - span from NW.jpg 2,000 × 1,506; 394 KB
 A87 Clachan Duich Bridge - view from war memorial.jpg 2,000 × 1,506; 399 KB
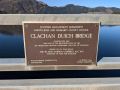 A87 Clachan Duich Bridge plaque.jpg 2,000 × 1,500; 398 KB
 A87 Feral Goats.jpg 1,280 × 960; 946 KB
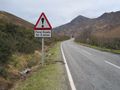
 A87 Glen Shiel - Deer risk.jpg 960 × 1,280; 706 KB
 A87 Glen Varragill - abutment.jpg 768 × 1,024; 701 KB
 A87 Glen Varragill - edge of carriageway.jpg 768 × 1,024; 650 KB
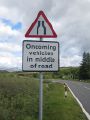 A87 Glen Varragill - road narrows - oncoming vehicles.jpg 768 × 1,024; 504 KB
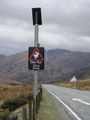
 A87 Sligachan - buses liable to stop on carriageway.jpg 776 × 753; 410 KB
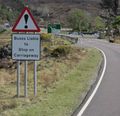
 A87 Sligachan - Buses stopping on carriageway.jpg 1,920 × 1,440; 998 KB
 A87 Sligachan - New bus stop layby.jpg 1,920 × 1,440; 983 KB
 A882 Achingale Bridge - road from east.jpg 2,000 × 1,500; 964 KB
 A882 Achingale Bridge - span from south.jpg 2,000 × 1,500; 944 KB
 A882 Watten crossroads - view from B870 south.jpg 2,000 × 1,500; 918 KB
 A882 Watten crossroads - westbound ADS.jpg 2,000 × 1,500; 961 KB
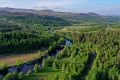
 A887 Cennacroc Bridge - aerial from SW.jpg 2,000 × 1,332; 997 KB
 A887 Cennacroc Bridge - aerial of old bridge.jpg 2,000 × 1,333; 950 KB
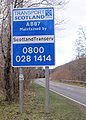 A887 customer contact sign.jpg 915 × 1,280; 173 KB
 A887 Torgoyle Bridge - aerial from south.jpg 2,000 × 1,333; 955 KB
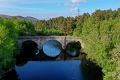 A887 Torgoyle Bridge - aerial from SW.jpg 2,000 × 1,333; 960 KB
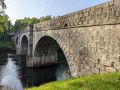 A887 Torgoyle Bridge from south bank.jpg 2,000 × 1,500; 991 KB
 A887 Torgyle - Otters.jpg 2,000 × 1,506; 984 KB
 A887 Torgyle - unofficial otters sign.jpg 2,000 × 1,506; 993 KB
 A890 Closed.jpg 1,280 × 960; 962 KB
 A890 Drochaid a' Chadha - ERDF sign.jpg 2,000 × 1,500; 994 KB
 A890 Strath Carron - ERDF sign.jpg 2,000 × 1,500; 978 KB
 A890 Strathcarron Junction - EB ADS.jpg 2,000 × 1,500; 982 KB
 A890 Strathcarron Junction - ERDF sign.jpg 2,000 × 1,500; 966 KB
 A890 Strathcarron Junction - Flag signs.jpg 2,000 × 1,500; 954 KB
 A890 Stromeferry Bypass - rockfall shelter aerial from east.jpg 2,000 × 1,334; 974 KB
 A890 Stromeferry sign Invermoriston.jpg 3,264 × 2,448; 3.3 MB
 A894 Laxford Bridge - NB ADS.jpg 2,000 × 1,500; 984 KB
 A894 Laxford Bridge - NWHTR JoG ADS.jpg 2,000 × 1,500; 977 KB
 A896 Allow overtaking sign.jpg 789 × 1,700; 124 KB
 A896 Allt Slugach - ERDF sign.jpg 2,000 × 1,500; 959 KB
 A896 Cromasaig - ERDF sign.jpg 2,000 × 1,500; 962 KB


_Baillieston_aerial.jpg)


_-_Coppermine_-_8823.jpg)
_-_Coppermine_-_8824.jpg)
_-_Coppermine_-_8825.jpg)
_-_Coppermine_-_8826.jpg)
_-_Coppermine_-_8827.jpg)
_-_Coppermine_-_8828.jpg)
_-_Coppermine_-_8829.jpg)
_-_Coppermine_-_8830.jpg)
_-_Coppermine_-_8831.jpg)
_-_Coppermine_-_8832.jpg)
_-_Coppermine_-_8833.jpg)
_-_Coppermine_-_8834.jpg)
_-_Coppermine_-_8835.jpg)


